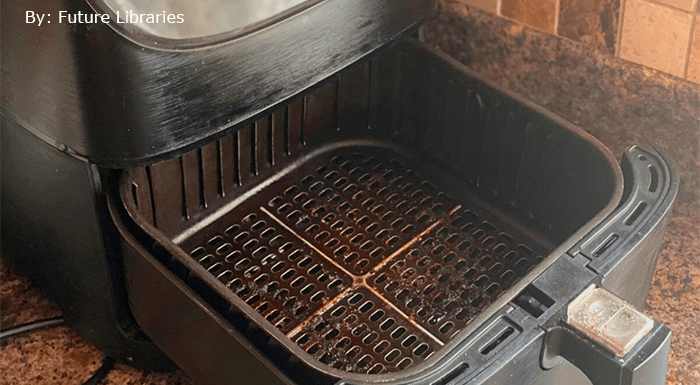
Air fryers have become a household staple for many, offering a quicker and healthier alternative to deep frying. They are easy to use, versatile, and produce crispy foods without needing a ton of oil.
However, like any kitchen appliance, they need regular cleaning to maintain performance and longevity.
If you’re wondering how to clean your air fryer properly, you’ve come to the right place. In this blog post, we’ll walk you through the essential steps to keep your air fryer spotless, safe, and in good working condition.
Why You Should Clean Your Air Fryer Regularly
Before we dive into the cleaning process, let’s first explore why it’s important to keep your air fryer clean.
Prevent Buildup of Grease and Food Residue: Over time, oils and food particles can build up inside the air fryer. This not only affects the performance of the appliance but also may lead to unpleasant odors and potentially even impact the taste of your food.
Maintain Cooking Performance: An air fryer that isn’t cleaned properly may not heat up evenly, leading to unevenly cooked food. Cleaning the basket and the inner components ensures the air fryer continues to function at its best.
Avoid Fire Hazards: Oil and food crumbs can accumulate in the heating element, and if not cleaned, these can become a fire hazard. Regular cleaning helps to prevent this risk.
Prolong Appliance Life: A well-maintained air fryer can last much longer, saving you money in the long run. Regular cleaning ensures that no residue clogs up the components or interferes with the machine’s overall efficiency.
Supplies You’ll Need
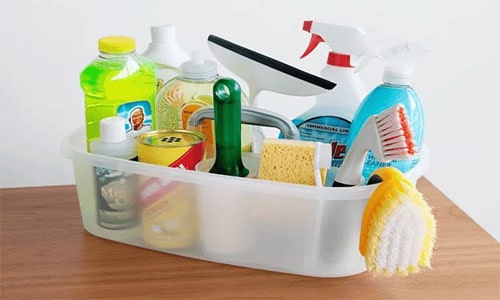
To clean your air fryer, gather the following supplies:
Mild dish soap
Warm water
A soft sponge or dishcloth
A soft-bristled brush (e.g., an old toothbrush)
A microfiber cloth or paper towels
A baking soda paste (optional, for tough stains)
Step-by-Step Guide to Clean an Air Fryer
Step 1: Unplug and Cool Down the Air Fryer
Before cleaning your air fryer, always unplug it and allow it to cool completely. This is important to prevent burns and to ensure that you don’t accidentally damage the appliance. Let it cool for at least 30 minutes after use.
Step 2: Remove and Wash the Basket, Tray, and Pan
Most air fryers have removable baskets, trays, and pans, all of which need to be cleaned after each use.
Follow these steps:
Remove the Components: Take out the basket and any additional trays or pans.
Soak in Warm Soapy Water: Fill a sink or large bowl with warm water and add a few drops of dish soap. Soak the basket and tray for 10-15 minutes to loosen any grease or food particles.
Scrub Gently: Using a soft sponge or dishcloth, scrub away any food debris and grease. Pay attention to the small holes in the basket and tray where food can get stuck. A soft-bristled brush, like an old toothbrush, works wonders for cleaning these tiny areas.
Use Baking Soda for Stubborn Stains: If there are tough, baked-on stains, make a paste with baking soda and water. Apply it to the affected areas, let it sit for 10-15 minutes, and then scrub with the brush.
Rinse and Dry: Once cleaned, rinse the basket, tray, and pan thoroughly with warm water to remove any soap residue. Dry them completely with a towel or let them air dry before reassembling the air fryer.
Step 3: Clean the Interior
The inside of the air fryer can accumulate oil splatters and food particles, which need to be cleaned to maintain good airflow and prevent odors.
Wipe with a Damp Cloth: Using a soft cloth or sponge, gently wipe down the inside of the air fryer’s cooking chamber. Be careful not to get any water on the heating element.
Use a Toothbrush for Hard-to-Reach Areas: For areas near the heating element or the edges of the cooking chamber, use a soft-bristled brush to remove any food particles. Don’t press too hard to avoid damaging the internal parts.
Tackle Oil Buildup: If there’s significant oil buildup on the walls, use a cloth dampened with warm, soapy water to gently wipe it away. Avoid soaking the interior with too much water.
Dry Thoroughly: Once the interior is clean, use a dry microfiber cloth to wipe down the inside and ensure all moisture is removed. This prevents any water from affecting the electronics or heating element.
Step 4: Clean the Heating Element
The heating element is crucial to the air fryer’s performance, and any food or grease that accumulates here can affect its efficiency. However, it’s important to be cautious when cleaning this part.
Turn the Air Fryer Upside Down: Once the air fryer has cooled, carefully turn it upside down to access the heating element.
Wipe with a Damp Cloth: Gently wipe the heating element with a damp cloth to remove any grease or debris. If necessary, use a soft-bristled brush to dislodge stubborn particles.
Avoid Using Water Directly: Don’t soak the heating element or spray it with water. Instead, ensure that your cloth is damp (not dripping) to prevent water from damaging the internal electronics.
Step 5: Clean the Exterior
The exterior of your air fryer can get dirty from fingerprints, grease splatters, or dust.
Clean the outside with the following steps:
Wipe with a Damp Cloth: Use a soft microfiber cloth dampened with warm water and mild dish soap to wipe down the exterior. Be sure to get into the crevices where dust and grease might accumulate.
Dry the Surface: After wiping down the exterior, use a dry cloth or towel to thoroughly dry the surface to prevent water from seeping into any openings.
Step 6: Reassemble and Store
Once all the parts are clean and completely dry, reassemble your air fryer. Store it in a dry, cool place when not in use. If you store it in a cabinet, consider leaving the drawer or door slightly open to allow any residual moisture to evaporate.
Additional Tips for Maintaining Your Air Fryer
Don’t Overcrowd the Basket: When cooking, try not to overcrowd the air fryer basket, as this can cause food to cook unevenly and lead to more grease buildup.
Use Parchment Paper: To make cleanup easier, use perforated parchment paper liners that are specifically designed for air fryers. This helps catch grease and crumbs and makes cleaning the basket a breeze.
Clean After Every Use: Try to clean your air fryer after each use, especially if you’ve cooked something particularly greasy or messy like bacon or chicken wings. This helps avoid a buildup of grime.
Check the Manufacturer’s Instructions: Always refer to your air fryer’s manual for specific cleaning instructions. Some models may have special recommendations or restrictions that are important to follow.
Conclusion
Cleaning your air fryer is a simple but essential part of its maintenance. By following these steps, you can keep your appliance running smoothly, ensuring delicious and healthy meals every time you use it.
Regular cleaning not only preserves the appliance’s longevity but also ensures a hygienic cooking environment, free from old grease, food crumbs, and odors.
With just a few minutes of attention after each use, your air fryer will continue to serve you for years to come. So, don’t neglect this crucial task – your air fryer will thank you for it!


